Amazon EC2 F1インスタンスを試してみた!

こんにちは。データサイエンスチームの t2sy です。
この記事は NHN テコラス DATAHOTEL:確率統計・機械学習・ビッグデータを語る Advent Calendar 2017 の22日目の記事です。
FPGA で機械学習をしたい! と思い、DE0-Nano Development Board (Cyclone IV) を買ってから未開封のまま2年の月日が流れました。
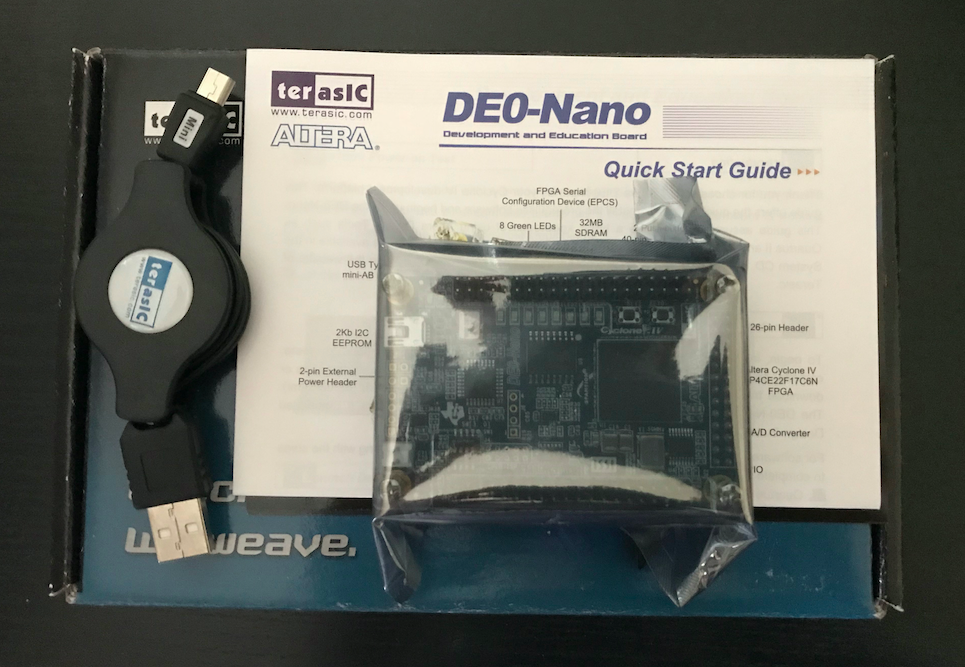
そんな中、データサイエンスチーム内の Slack チャンネルで Amazon EC2 F1 インスタンスの存在を知り、手元に実機がなくても Xilinx の開発ツール Vivado を使い FPGA を試せるということで、これを逃しては FPGA を動かす機会は訪れないかもしれないと思いチャレンジしてみました。
EC2 F1 インスタンスは、FPGA を搭載した高速コンピューティングインスタンスです。
今回は、EC2 F1 インスタンスの起動から、サンプル回路 cl_hello_world の動作検証を行うところまでを紹介します。
- EC2 F1インスタンスを起動する
- EC2 F1インスタンスに接続する
- AFIを作成する
- AFIをロードする
- 回路の動作検証を行う
1. EC2 F1インスタンスを起動する
EC2 Management Console にアクセスし、インスタンスの作成をクリックします。リージョンにバージニア北部 (N.Virginia) を選択します。
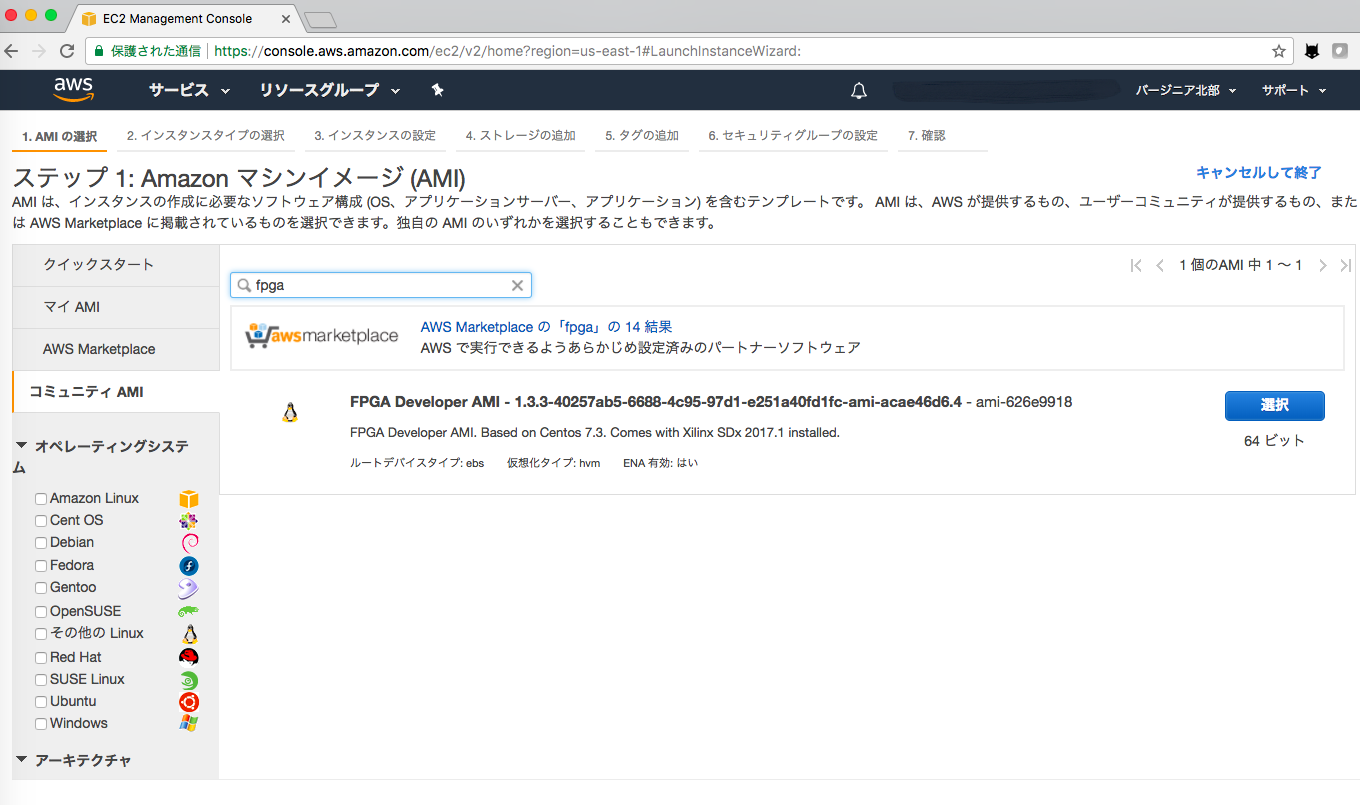
続いて、コミュニティAMI を選択し fpga と入力し、検索結果から FPGA Developer AMI (CentOS) を選択します。
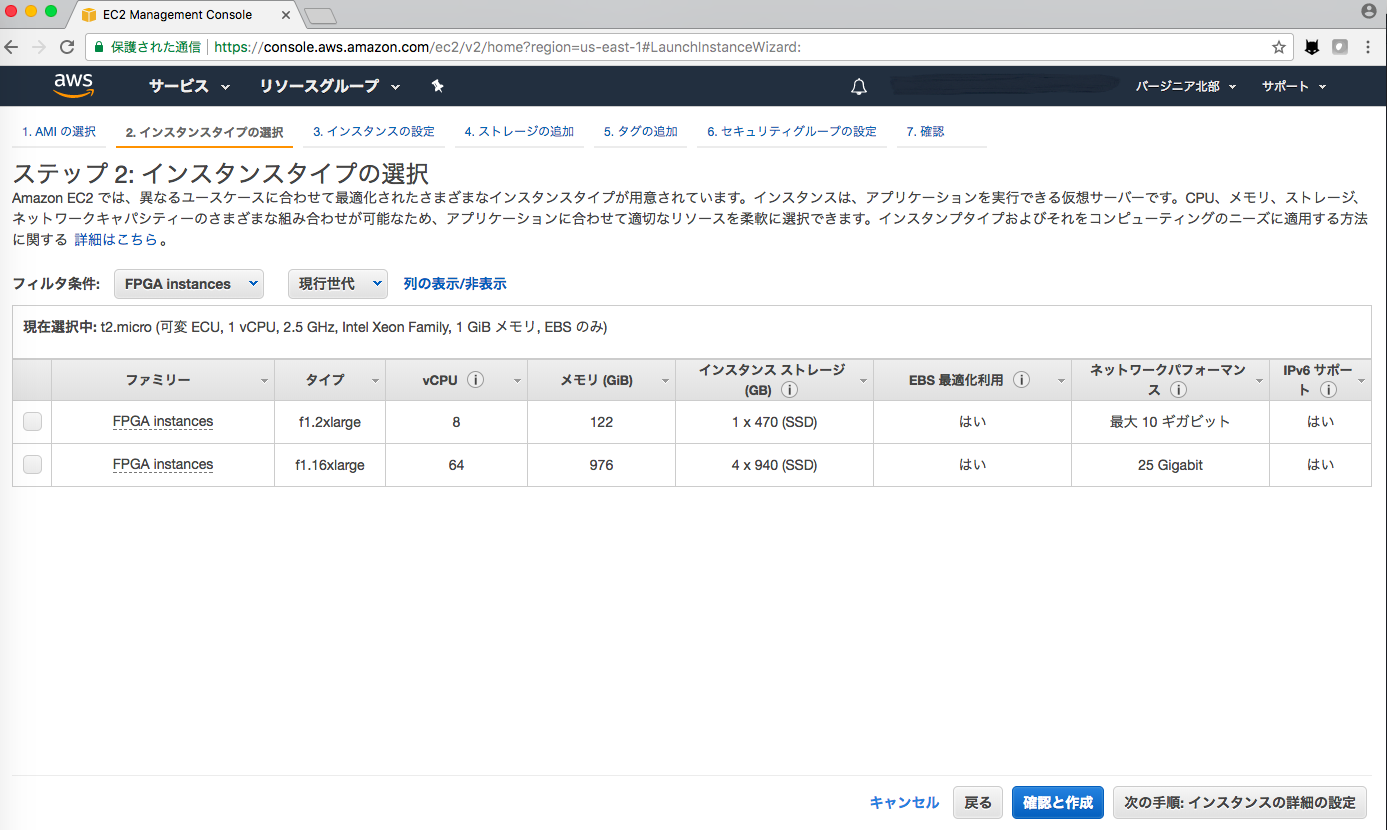
インスタンスタイプの選択でフィルタ条件から FPGA Instances を選択します。今回は f1.2xlarge を選択しました。
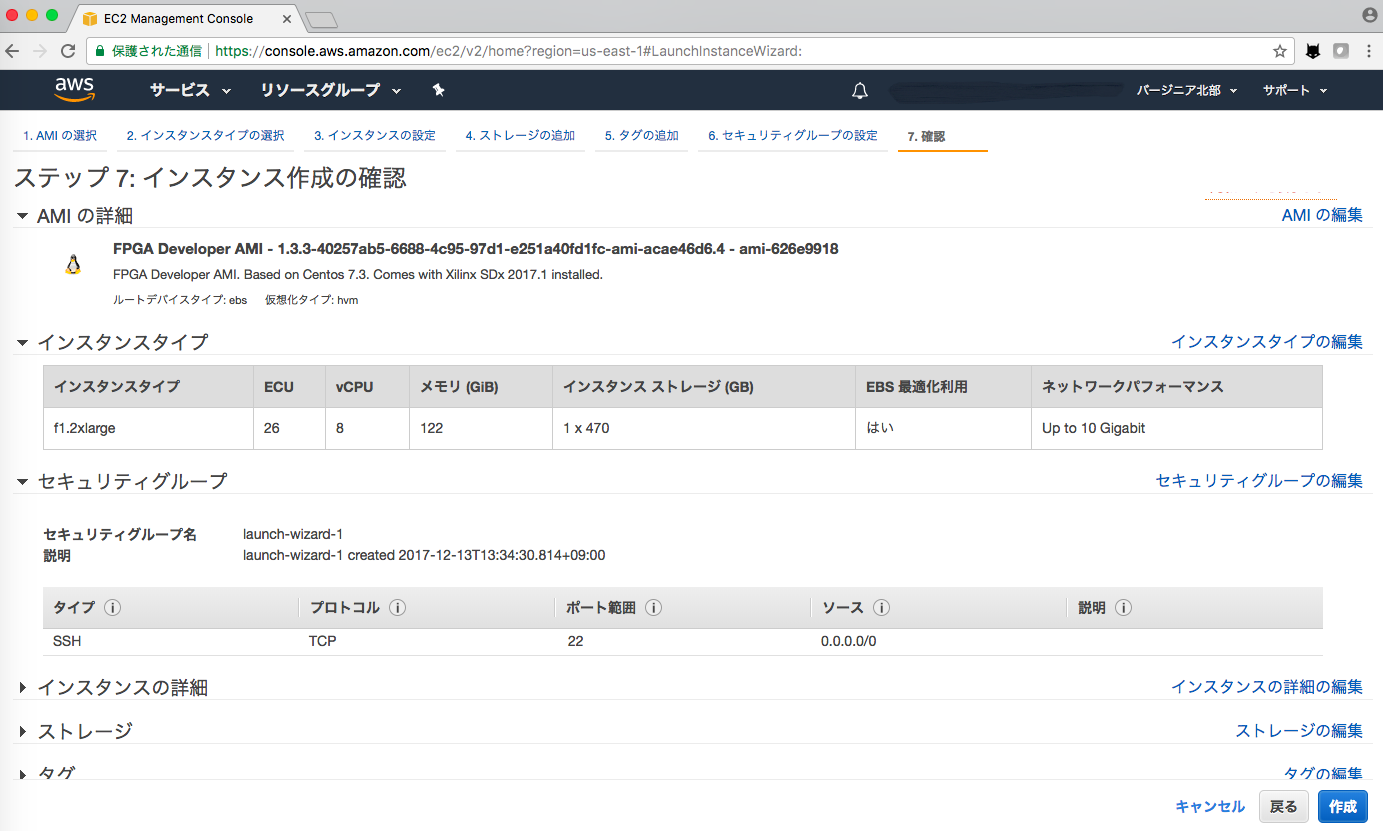
ストレージやセキュリティグループの設定はデフォルトのままとしましたが、状況に応じて適切な設定を行います。
最後に、インスタンス作成の確認から作成をクリックするとEC2 F1インスタンスが起動します。
2. EC2 F1インスタンスに接続する
作成した EC2 F1インスタンスにSSHで接続します。ユーザ名は centos です。
$ ssh -i ~/.ssh/your-key.pem centos@ec2-your-global-ip.compute-1.amazonaws.com
The authenticity of host 'ec2-34-229-182-29.compute-1.amazonaws.com (34.229.182.29)' can't be established.
ECDSA key fingerprint is SHA256:bSLBO6X66EOd6Os4Gq82rT/0V+nL7m2Fi9O22nV4GLk.
Are you sure you want to continue connecting (yes/no)? yes
Warning: Permanently added 'ec2-34-229-182-29.compute-1.amazonaws.com,34.229.182.29' (ECDSA) to the list of known hosts.
 ___ ___  ___   _     ___  _____   __    _   __  __ ___
| __| _ \/ __| /_\   |   \| __\ \ / /   /_\ |  \/  |_ _|
| _||  _/ (_ |/ _ \  | |) | _| \ V /   / _ \| |\/| || |
|_| |_|  \___/_/ \_\ |___/|___| \_/   /_/ \_\_|  |_|___|
AMI Version:        1.3.3
Readme:             /home/centos/src/README.md
GUI Setup Steps:    /home/centos/src/GUI_README.md
AMI Release Notes:  /home/centos/src/RELEASE_NOTES.md
Xilinx Tools:       /opt/Xilinx/
Developer Support:  https://github.com/aws/aws-fpga/blob/master/README.md#developer-support
Centos Common code: /srv/git/centos-git-common
無事にSSH接続ができたら、aws configureコマンドでAWSアカウント情報を設定します。
この時、 IAM (Identity and Access Management) ユーザのアクセスキーIDとシークレットアクセスキーを入力します。IAM はユーザに対して AWS の各種サービスやリソースへのアクセスを制御するための仕組みです。 (シークレットアクセスキーはアクセスキー作成時にのみ確認できます)
[centos@ip-172-31-44-166 ~]$ aws configure
AWS Access Key ID [None]: your-access-key-id
AWS Secret Access Key [None]: your-secret-access-key
Default region name [None]: us-east-1
Default output format [None]: json
また、IAM Management Console で S3 と EC2 のアクセスを許可に設定しておきます。
3. AFIを作成する
続いて AFI (Amazon FPGA Image) を作成してみます。まず、git clone で aws-fpga リポジトリを複製します。
[centos@ip-172-31-44-166 ~]$ git clone https://github.com/aws/aws-fpga.git
HDK (Hardware Development Kit) をセットアップします。
[centos@ip-172-31-44-166 ~]$ cd aws-fpga/
[centos@ip-172-31-44-166 aws-fpga]$ source hdk_setup.sh
INFO: Using Vivado v2017.1_sdxop (64-bit)
INFO: Setting up environment variables
INFO: Using HDK shell version shell_v071417d3
...
# exit
INFO: [Common 17-206] Exiting Vivado at Wed Dec 13 06:37:52 2017...
INFO: [Common 17-206] Exiting Vivado at Wed Dec 13 06:37:52 2017...
Copying files to /home/centos/aws-fpga/hdk/common/verif/models/ddr4_model
Copying files to /home/centos/aws-fpga/hdk/common/verif/models/ddr4_rdimm_wrapper
patching ddr4_rank.sv file
INFO: DDR4 model build passed.
INFO: ATTENTION: Don't forget to set the CL_DIR variable for the directory of your Custom Logic.
INFO: AWS HDK setup PASSED.
今回は付属の cl_hello_world を試してみます。
環境変数 CL_DIR を設定し、aws_build_dcp_from_cl.sh を実行します。
数時間かかりますが Vivado によるビルドは nohup コマンドによりバックグラウンドで実行されるため、一旦ログアウトしても大丈夫です。
[centos@ip-172-31-44-166 aws-fpga]$ cd hdk/cl/examples/cl_hello_world
[centos@ip-172-31-44-166 cl_hello_world]$ export CL_DIR=$(pwd)
[centos@ip-172-31-44-166 cl_hello_world]$ cd $CL_DIR/build/scripts
[centos@ip-172-31-44-166 scripts]$ ./aws_build_dcp_from_cl.sh
INFO: Starting the design checkpoint build process
INFO: Checking for proper environment variables and build directories
INFO: Environment variables and directories are present. Checking for Vivado installation.
INFO: Build through Vivado is running as background process, this may take few hours.
INFO: Output is being redirected to 17_12_14-091615.nohup.out
INFO: If you have set your EMAIL environment variable and -notify is specified, you will receive a notification when complete.
INFO:   (See $HDK_DIR/cl/examples/README.md for details)
ビルドが成功すると、$CL_DIR/build/checkpoints/to_aws に *.Developer_CL.tar という tar ファイルが作成されます。
次に、S3 に作成した tar ファイルをアップロードします。
準備として S3 にバケットを作成します。今回は cl_hello_world というバケットを作成し dcp、log というフォルダを作成します。
[centos@ip-172-31-44-166 cl_hello_world]$ aws s3 mb s3://cl_hello_world --region us-east-1
make_bucket: cl_hello_world
[centos@ip-172-31-44-166 cl_hello_world]$ aws s3 mb s3://cl_hello_world/dcp
make_bucket: cl_hello_world
[centos@ip-172-31-44-166 cl_hello_world]$ aws s3 mb s3://cl_hello_world/log
make_bucket: cl_hello_world
[centos@ip-172-31-44-166 cl_hello_world]$ touch LOGS_FILES_GO_HERE.txt
[centos@ip-172-31-44-166 cl_hello_world]$ aws s3 cp LOGS_FILES_GO_HERE.txt s3://cl_hello_world/log/
upload: ./LOGS_FILES_GO_HERE.txt to s3://cl_hello_world/log/LOGS_FILES_GO_HERE.txt
続いて、tar ファイルを s3://cl_hello_world/dcp/ にアップロードします。
[centos@ip-172-31-44-166 cl_hello_world]$ aws s3 cp $CL_DIR/build/checkpoints/to_aws/*.Developer_CL.tar s3://cl_hello_world/dcp/
upload: build/checkpoints/to_aws/17_12_14-091615.Developer_CL.tar to s3://cl_hello_world/dcp/17_12_14-091615.Developer_CL.tar
AFI の作成を開始する前にバケットポリシーを追加します。
まず、S3 Management Console にアクセスします。 cl_hello_world バケットを選択し、アクセス権限タブを選択します。
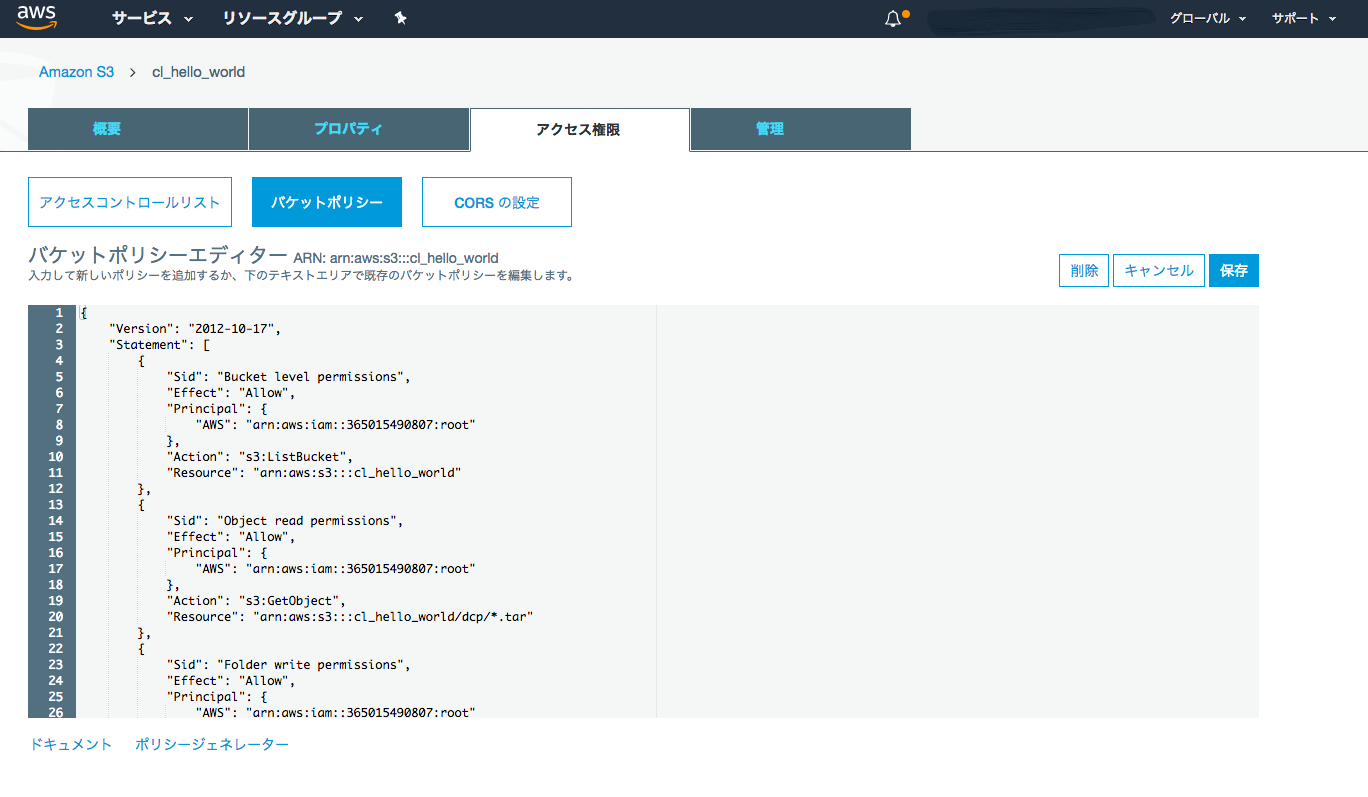
バケットポリシーをクリックし、バケットポリシーエディターに以下の JSON を入力し保存します。(バケット名やフォルダ名は適切に合わせて下さい)
{
    "Version": "2012-10-17",
    "Statement": [
        {
            "Sid": "Bucket level permissions",
            "Effect": "Allow",
            "Principal": {
                "AWS": "arn:aws:iam::365015490807:root"
            },
            "Action": "s3:ListBucket",
            "Resource": "arn:aws:s3:::cl_hello_world"
        },
        {
            "Sid": "Object read permissions",
            "Effect": "Allow",
            "Principal": {
                "AWS": "arn:aws:iam::365015490807:root"
            },
            "Action": "s3:GetObject",
            "Resource": "arn:aws:s3:::cl_hello_world/dcp/*.tar"
        },
        {
            "Sid": "Folder write permissions",
            "Effect": "Allow",
            "Principal": {
                "AWS": "arn:aws:iam::365015490807:root"
            },
            "Action": "s3:PutObject",
            "Resource": "arn:aws:s3:::cl_hello_world/log/*"
        }
    ]
}
aws ec2 コマンドの create-fpga-image サブコマンドを使って AFI の作成を開始します。S3バケット名やキー名を確認し実行します。
作成が開始されると、AFI ID (Amazon FPGA Image ID) と AGFI ID (Amazon Global FPGA Image ID) が返ってきます。
 [centos@ip-172-31-44-166 cl_hello_world]$ aws ec2 create-fpga-image \
 >         --region us-east-1 \
 >         --name cl_hello_world \
 >         --description cl_hello_world \
 >         --input-storage-location Bucket=cl_hello_world,Key=dcp/17_12_14-091615.Developer_CL.tar \
 >         --logs-storage-location Bucket=cl_hello_world,Key=log \
 >
 {
     "FpgaImageId": "afi-0c0abc6db4a2e0f33",
     "FpgaImageGlobalId": "agfi-0f0ae79bd6a11335f"
 }
この直後に describe-fpga-images サブコマンドを実行すると、作成中のため State が pending となっていることが確認できます。
[centos@ip-172-31-44-166 cl_hello_world]$ aws ec2 describe-fpga-images --fpga-image-ids afi-0c0abc6db4a2e0f33
{
    "FpgaImages": [
        {
            "UpdateTime": "2017-12-15T02:03:32.000Z",
            "Name": "cl_hello_world",
            "FpgaImageGlobalId": "agfi-0f0ae79bd6a11335f",
            "Public": false,
            "State": {
                "Code": "pending"
            },
            "OwnerId": "511442695781",
            "FpgaImageId": "afi-0c0abc6db4a2e0f33",
            "CreateTime": "2017-12-15T02:03:31.000Z",
            "Description": "cl_hello_world"
        }
    ]
}
約1時間後に再度 describe-fpga-images サブコマンドを実行すると State が available に変わり AFI が作成が完了していました。
[centos@ip-172-31-44-166 cl_hello_world]$ aws ec2 describe-fpga-images --fpga-image-ids afi-0c0abc6db4a2e0f33
{
    "FpgaImages": [
        {
            "UpdateTime": "2017-12-15T02:30:07.000Z",
            "Name": "cl_hello_world",
            "PciId": {
                "SubsystemVendorId": "0xfedd",
                "VendorId": "0x1d0f",
                "DeviceId": "0xf000",
                "SubsystemId": "0x1d51"
            },
            "FpgaImageGlobalId": "agfi-0f0ae79bd6a11335f",
            "Public": false,
            "State": {
                "Code": "available"
            },
            "ShellVersion": "0x071417d3",
            "OwnerId": "511442695781",
            "FpgaImageId": "afi-0c0abc6db4a2e0f33",
            "CreateTime": "2017-12-15T02:03:31.000Z",
            "Description": "cl_hello_world"
        }
    ]
}
4. AFIをロードする
次に、AFIをロードするために SDK (Software Development Kit) のセットアップを行います。aws-fpga 以下の sdk_setup.sh を実行します。
[centos@ip-172-31-44-166 cl_hello_world]$ cd ~/aws-fpga
[centos@ip-172-31-44-166 aws-fpga]$ source sdk_setup.sh
INFO: Changing AWS_FPGA_REPO_DIR from /home/centos/src/project_data/aws-fpga to /home/centos/aws-fpga
...
Build complete.
Root privileges are required to install. You may be asked for your password...
Executing as root...
AWS FPGA: Copying Amazon FPGA Image (AFI) Management Tools to /usr/bin
AWS FPGA: Installing shared library to /usr/local/lib64
        libfpga_mgmt.so.1 (libc6,x86-64) => /usr/local/lib64/libfpga_mgmt.so.1
AWS FPGA: Done with Amazon FPGA Image (AFI) Management Tools install.
Done with SDK install.
INFO: sdk_setup.sh PASSED
/opt/Xilinx/SDx/2017.1.op/Vivado/bin へのコマンド検索パスが追加され、/usr/bin に FPGA Management tools がインストールされました。
[centos@ip-172-31-44-166 aws-fpga]$ echo $PATH
/opt/Xilinx/SDx/2017.1.op/Vivado/bin:/home/centos/aws-fpga/hdk/common/scripts:/opt/Xilinx/SDx/2017.1.op/bin:/opt/Xilinx/SDx/2017.1.op/Vivado/bin:/opt/Xilinx/SDx/2017.1.op/Vivado_HLS/bin:/usr/local/bin:/usr/bin:/usr/local/sbin:/usr/sbin:/srv/git/centos-git-common:/home/centos/.local/bin:/home/centos/bin
[centos@ip-172-31-44-166 aws-fpga]$ ls -l /usr/bin/fpga-*
-rwxr-xr-x 1 root root   631 12月 15 03:17 /usr/bin/fpga-clear-local-image
-rwxr-xr-x 1 root root   634 12月 15 03:17 /usr/bin/fpga-describe-local-image
-rwxr-xr-x 1 root root   639 12月 15 03:17 /usr/bin/fpga-describe-local-image-slots
-rwxr-xr-x 1 root root   630 12月 15 03:17 /usr/bin/fpga-get-virtual-dip-switch
-rwxr-xr-x 1 root root   630 12月 15 03:17 /usr/bin/fpga-get-virtual-led
-rwxr-xr-x 1 root root   630 12月 15 03:17 /usr/bin/fpga-load-local-image
-rwxr-xr-x 1 root root 74496 12月 15 03:17 /usr/bin/fpga-local-cmd
-rwxr-xr-x 1 root root   630 12月 15 03:17 /usr/bin/fpga-set-virtual-dip-switch
-rwxr-xr-x 1 root root   633 12月 15 03:17 /usr/bin/fpga-start-virtual-jtag
AFI をスロット0にロードしますが、その前に fpga-describe-local-image コマンドでスロット0がクリアされていることを確認します。
[centos@ip-172-31-44-166 aws-fpga]$ sudo fpga-describe-local-image -S 0 -H
Type  FpgaImageSlot  FpgaImageId             StatusName    StatusCode   ErrorName    ErrorCode   ShVersion
AFI          0       none                    cleared           1        ok               0       0x071417d3
Type  FpgaImageSlot  VendorId    DeviceId    DBDF
AFIDEVICE    0       0x1d0f      0x1042      0000:00:1d.0
クリアされていない場合、fpga-clear-local-image コマンドでスロット0をクリアします。
[centos@ip-172-31-44-166 aws-fpga]$ sudo fpga-clear-local-image  -S 0
AFI          0       none                    cleared           1        ok               0       0x071417d3
AFIDEVICE    0       0x1d0f      0x1042      0000:00:1d.0
fpga-load-local-image コマンドでスロット0に AFI をロードします。 IオプションにAGFI IDを指定します。
[centos@ip-172-31-44-166 aws-fpga]$ sudo fpga-load-local-image -S 0 -I agfi-0f0ae79bd6a11335f
AFI          0       agfi-0f0ae79bd6a11335f  loaded            0        ok               0       0x071417d3
AFIDEVICE    0       0x1d0f      0xf000      0000:00:1d.0
5. 回路の動作検証を行う
ロードした AFI が正常に動作するかアプリケーションで検証してみます。make コマンドで test_hello_world.c (peek_poke_example) をビルドします。
[centos@ip-172-31-44-166 aws-fpga]$ cd $CL_DIR/software/runtime/
[centos@ip-172-31-44-166 runtime]$ make all
gcc -DCONFIG_LOGLEVEL=4 -g -Wall -I/home/centos/aws-fpga/sdk/userspace/include -I /home/centos/aws-fpga/hdk/common/software/include -I ./include -c -o /home/centos/aws-fpga/sdk/userspace/utils/sh_dpi_tasks.o /home/centos/aws-fpga/sdk/userspace/utils/sh_dpi_tasks.c
gcc -DCONFIG_LOGLEVEL=4 -g -Wall -I/home/centos/aws-fpga/sdk/userspace/include -I /home/centos/aws-fpga/hdk/common/software/include -I ./include -o test_hello_world /home/centos/aws-fpga/sdk/userspace/utils/sh_dpi_tasks.o test_hello_world.o  -lfpga_mgmt -lrt -lpthread
peek_poke_example では 32bit のデータ 0xefbeadde を Hello World レジスタに書き込み、読み出した値が 0xdeadbeef (リトルエンディアンのようにバイトスワップされた値) と一致するかテストします。
peek_poke_example を実行してみます。
[centos@ip-172-31-44-166 runtime]$ sudo ./test_hello_world
AFI PCI  Vendor ID: 0x1d0f, Device ID 0xf000
===== Starting with peek_poke_example =====
Writing 0xefbeadde to HELLO_WORLD register (0x0000000000000500)
=====  Entering peek_poke_example =====
register: 0xdeadbeef
Resulting value matched expected value 0xdeadbeef. It worked!
Developers are encouraged to modify the Virtual DIP Switch by calling the linux shell command to demonstrate how AWS FPGA Virtual DIP switches can be used to change a CustomLogic functionality:
$ fpga-set-virtual-dip-switch -S (slot-id) -D (16 digit setting)
In this example, setting a virtual DIP switch to zero clears the corresponding LED, even if the peek-poke example would set it to 1.
For instance:
# sudo fpga-set-virtual-dip-switch -S 0 -D 1111111111111111
# sudo fpga-get-virtual-led  -S 0
FPGA slot id 0 have the following Virtual LED:
1010-1101-1101-1110
# sudo fpga-set-virtual-dip-switch -S 0 -D 0000000000000000
# sudo fpga-get-virtual-led  -S 0
FPGA slot id 0 have the following Virtual LED:
0000-0000-0000-0000
正常に動作していることが確認できました。
ハードウェア開発の Hello World と言えば LEDチカチカ (通称: Lチカ) ですね。この回路では仮想LEDと仮想DIPスイッチを制御することができるようです。
仮想LEDレジスタは Hello World レジスタの下位16ビットと同じ値を保持するようにシャドウする16ビット幅の読み取り専用レジスタです。仮想LEDの出力は、仮想LEDレジスタと仮想DIPスイッチのbit単位の論理積となります。 (cl_hello_world.sv)
// The register contains 16 read-only bits corresponding to 16 LED's.
// For this example, the virtual LED register shadows the hello_world
// register.
// The same LED values can be read from the CL to Shell interface
// by using the linux FPGA tool: $ fpga-get-virtual-led -S 0
always_ff @(posedge clk_main_a0)
   if (!rst_main_n_sync) begin                    // Reset
      vled_q[15:0] <= 16'h0000;
   end
   else begin
      vled_q[15:0] <= hello_world_q[15:0];
   end
// The Virtual LED outputs will be masked with the Virtual DIP switches.
assign pre_cl_sh_status_vled[15:0] = vled_q[15:0] & sh_cl_status_vdip_q2[15:0];
まず、仮想DIPスイッチと仮想LEDの初期状態を確認します。
[centos@ip-172-31-44-166 runtime]$ sudo fpga-get-virtual-dip-switch -S 0
FPGA slot id 0 has the following Virtual DIP Switches:
0000-0000-0000-0000
[centos@ip-172-31-44-166 runtime]$ sudo fpga-get-virtual-led  -S 0
FPGA slot id 0 have the following Virtual LED:
0000-0000-0000-0000
仮想DIPスイッチを全て ON にしてみます。
[centos@ip-172-31-44-166 runtime]$ sudo fpga-set-virtual-dip-switch -S 0 -D 1111111111111111
[centos@ip-172-31-44-166 runtime]$ sudo fpga-get-virtual-dip-switch -S 0
FPGA slot id 0 has the following Virtual DIP Switches:
1111-1111-1111-1111
[centos@ip-172-31-44-166 runtime]$ sudo fpga-get-virtual-led  -S 0
FPGA slot id 0 have the following Virtual LED:
1010-1101-1101-1110
仮想LEDの出力は 1010-1101-1101-1110 に変わっており、 これは Hello World レジスタに書き込んだ 0xefbeadde (1110-1111-1011-1110-1010-1101-1101-1110) の下位16bitと同じ値のため期待通りの動作であることが確認できました。
おわりに
今回は、EC2 F1 インスタンスの起動から、サンプル回路 cl_hello_world の動作検証を行うところまでを紹介しました。
FPGAは、エッジ端末で Deep-Learning の推論を行うエッジコンピューティング分野など、CPUより高速・GPUより電力効率が高いことが要求される分野での活用に注目が集まっています。
AWS Marketplace では FPGA で Deep-Learning の推論を行う AMI をいくつか見つけることができます。EC2 F1 インスタンスを、FPGA検討の際の選択肢に入れてみてはいかがでしょうか。
当社ではAWS請求代行・活用支援サービスを行っております。また、マネージドクラウド fow AWS として、AWSの運用代行・監視なども行っております。
オトクなEC2割引サービス、無償サポートから導入・移行支援・運用自動化をはじめとした各種プロフェッショナルサービスを提供しておりますのでぜひご活用ください。
参考文献
テックブログ新着情報のほか、AWSやGoogle Cloudに関するお役立ち情報を配信中!
Follow @twitter2016年11月、データサイエンティストとして中途入社。時系列分析や異常検知、情報推薦に特に興味があります。クロスバイク、映画鑑賞、猫が好き。
Recommends
こちらもおすすめ
-

QuickSightとAthenaを活用!データ分析入門
2017.12.11
-

AWS に acmailer と MMDS で作るメール配信システム
2015.10.21
-

Amazon EC2のP3インスタンスとは?P2、G3インスタンスとの比較
2017.11.13
Special Topics
注目記事はこちら

データ分析入門
これから始めるBigQuery基礎知識
2024.02.28

AWSの料金が 10 %割引になる!
『AWSの請求代行リセールサービス』
2024.07.16


